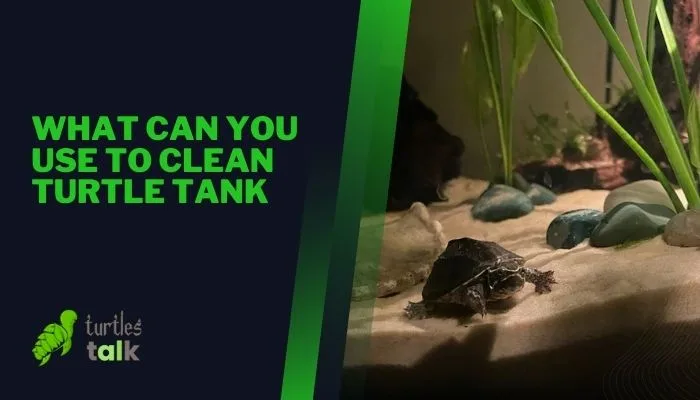
What Can You Use to Clean Turtle Tank
If you are a proud turtle owner and you’re looking after their habitat, you might be wondering, what can you use to clean a turtle tank?
You can use a combination of aquatic-safe cleaning agents, scrubbing tools, and a little bit of elbow grease to clean a turtle tank. It’s best to use vinegar diluted with water, which is safe for turtles and effective for decontaminating tanks.
Keep reading to find out specific steps to clean your turtle’s tank and maintain a safe, happy home for your shelled friend.
A Deep Dive into the World of Turtles
Turtles, like all living creatures, demand a healthy and clean environment to survive and thrive. However, maintaining their habitat, particularly a turtle tank, isn’t akin to cleaning a traditional fish tank.
Understanding Your Turtle’s Habitat
An integral part of owning a turtle or tortoise is understanding their habitat. Unlike most pets, turtles are amphibians which means they require both land and water in their habitat. Although the specifics can fluctuate based on species, a standard turtle tank should contain a swimming area and a dry hoarding area. Typically, 75% of the tank is filled with water for swimming and another 25% is kept dry for basking and resting.
Considering a turtle’s nature, the water in their tank can easily become grubby from food and waste. Turtles can produce a large amount of waste, thus, without regular cleaning, the water can quickly become polluted and risk the health of your turtle. Most turtles can catch diseases easily from dirty water. In addition, poor water quality can lead to eye, skin, and shell infections. Therefore, it is essential to regularly clean the water, monitor the pH levels, and keep it bacteria-free.
The Importance of a Clean Tank
The significance of a pristine tank can’t be overstated. On average, it is suggested to clean your turtle tank at least once every two weeks. However, for smaller tanks or ones where multiple turtles reside, you might need to clean it every week. This routine helps to prevent harmful bacteria buildup and ensure your turtle’s healthy and happy living.
Since turtles eat, sleep, and defecate in the same living space, any waste leftover can produce harmful substances like ammonia and nitrites. Ammonia, in particular, is extremely harmful and can cause respiratory and skin problems in turtles. Therefore, it is crucial to remove any uneaten food and other waste as soon as possible. This not only helps keep the tank clean but also maintains a safe and healthy environment for the turtle.
Aquarium water test kits are available which allow you to monitor the levels of harmful chemicals, pH level, and temperature of the water. They are a handy tool to ensure your turtle is living in an environment that suits its needs.
To recap, understanding your turtle’s habitat and maintaining its cleanliness plays a vital role in the turtle’s overall health and lifespan. With regular maintenance and cleanliness, you can create a wonderful home for your pet turtle.
Assessing Your Turtle Tank’s Condition
The condition of your turtle tank has a direct impact on the health and happiness of your aquatic friend. A well-maintained turtle tank not only keeps your turtle in good health but also makes the tank look visually pleasing. Therefore, it’s essential to keep track of your turtle tank’s cleanliness and hygiene regularly.
How Often Should You Be Cleaning?
Tank cleaning frequency depends on a variety of factors, such as the size of the tank, the number of turtles, and their size. However, as a general guideline, it’s recommended to do a partial water change (about 25% to 50%) every week, especially if you have multiple turtles in one tank. A more thorough clean, where you clean the shell, filter, and substrate, is typically needed monthly. Clean the accessories and decorations in the tank regularly to prevent a buildup of algae and bacteria.
Signs Your Tank May Need a Clean
Keeping an eye out for certain signs can help determine when your tank might need a good clean. If there’s a noticeable odor or the water appears cloudy, these are strong indications your tank needs cleaning. Similarly, the presence of algae on the glass, decorations, or tank equipment also suggests the need for a thorough clean.
Observe your turtle’s behavior as well. Turtles, like other pets, can behave unusually when their environment isn’t clean. If they appear lethargic or aren’t eating as they typically would, consider checking the tank conditions. You might just find that it’s time for a cleanup.
Remember, consistent maintenance is key in caring for your turtle. Regular cleaning keeps your turtle healthy and happy, and with a little bit of work every week can prevent bigger issues down the line.
Pre-Cleaning Checklist
Before you start cleaning your turtle tank, it’s crucial to make sure you have all the necessary materials on hand. This pre-cleaning checklist will help you stay organized and ensure you’re ready for each step of the process.
Materials You’ll Need
The list of materials you’ll need to thoroughly clean your turtle tank includes:
- Aquarium-safe cleaner or vinegar
- A scrub brush or toothbrush
- Algae cleaning magnet
- Gravel vacuum or siphon tube
- Clean towels or paper towels
- Replacement water that matches the tank’s temperature
- Buckets for dirty and clean water
Gather Your Cleaning Arsenal
Preparing your materials beforehand will streamline the process and save you from pausing midway. Collect each item listed above and keep them close at hand. The aquarium-safe cleaner or vinegar is to help remove the stubborn dirt and algae on the glass. A scrub brush or toothbrush comes in handy to scrub off any hard-to-remove waste or algae. The algae cleaning magnet is useful for cleaning the inside of the tank without getting your hands wet. The gravel vacuum or siphon tube will allow you to clean the substrate without removing it.
Remember, keeping clean towels or paper towels nearby will be beneficial when you need to dry any spills or your hands quickly. A bucket for dirty water and a separate one for clean water is also essential to avoid contamination. When replacing the water, remember it should match the previous temperature to prevent any shock to your turtle.
Prepping Your Work Space
Once you’ve gathered all your materials, the next step is to prepare your workspace. Ensure you have adequate space to work and access to a sink or outdoor hose. Clear away any household items or substances that could contaminate the tank like detergents or cleaning chemicals.
Furthermore, it’s beneficial to lay down towels or newspaper around your workspace to catch any spills or drips. If possible, perform the cleaning in a well-lit area so that you can clearly see what you’re doing, making sure you provide a thorough cleaning for your turtle tank.
The Grand Clean: Step-by-Step
Let’s begin with the grand cleaning process! First, you have to disassemble your tank for thorough cleaning, which might seem a bit challenging at first, but once you get into it, it becomes a surprisingly soothing task.
Disassembling Your Tank for a Thorough Clean
While disassembling your tank, start by removing your turtle and placing it in a safe and temporary enclosure. After taking the turtle out, proceed to remove all the fixtures inside the tank, be it rocks, hiding spots, plants whether real or plastic. Be gentle during this process for the well-being of your aquatic buddy between tank cleans.
Cleaning Your Turtle’s Swimming Water
Even if the swimming water doesn’t look dirty to the naked eye, you cannot underestimate the chance of residual waste or bacterial contamination. Empty all the water from the tank and replace it with fresh, treated water. The temperature of the water should ideally hover around 75-86 ℉ (24-30℃). Also, remember to use water conditioners to remove chlorine and other harmful chemicals from tap water.
Scrubbing Down the Tank Walls
Over time, tank walls can accumulate algae and other slimy residues. A scrub brush or algae scrubber will help cleanse these off. Avoid using soap or detergents as they can leave harmful residue harmful to your turtle. Instead, you can use a solution of one part vinegar to nine parts water to scrub down the tank walls. Vinegar, being mild, helps to break down calcium deposits without affecting the tank or the turtle’s health.
Handling and Cleaning the Substrate (The Grit & Gravel)
The substrates at the bottom of your tank will also need thorough cleaning since they accumulate waste over time. Remove all of it and rinse with warm water until the water runs clear. You may use a coarse sieve to get the finer dust and debris out. For stubborn grime stuck on larger pebbles, consider soaking them in the vinegar solution for a while before scrubbing them clean.
Keep in mind that all these steps set a clean, safe, and happy environment for your turtle. Get into a routine of cleaning, and it’ll become second nature before you know it!
Give Your Turtle a Little Spa Treatment
Cleaning your turtle tank doesn’t have to be a daunting task. It can also be a little time that you dedicate to pamper your pet turtle. Let’s call it a ‘spa treatment’! Interestingly, your turtle can enjoy a fresh, clean environment while you can take satisfaction in providing the best care for your reptilian friend.
Caring for Your Turtle Whilst Cleaning
The first step towards cleaning your turtle tank is to ensure your turtle is safe and comfortable. Your turtle will need a temporary home while you clean their tank. Be careful not to put the turtle in too large or too small containers. A small kiddie pool or a large plastic container can serve the purpose. Remember, the temporary home should be somewhere safe where the turtle can’t escape or get hurt.
Always make sure that the space is clean and free from any possible threats. You can put some familiar items from the tank into the temporary home to make your turtle feel at ease, like their favorite rock or a hiding place, along with enough water for them to swim and drink.
While your turtle is in their temporary home, it is also an excellent time to monitor it closely. Look out for any signs of illness or stress because the process of moving can sometimes be intense for these delicate creatures.
The Dos and Don’ts of a Turtle’s Temporary Home
When it comes to placing your turtle in a temporary home, there are a few dos and don’ts to keep in mind to ensure the safety and comfort of your pet.
Do provide enough water in the temporary home. Turtles need water not just for drinking, but also for swimming and playing.
Don’t put the turtle in a high-sided container from which it might try to escape and fall. Turtles are excellent climbers, especially when they have a mind to explore their surroundings, so it’s advisable to use a container with low sides.
Do keep the temporary home in a calm, quiet part of your home. Excessive noise and activity can stress your turtle.
Don’t leave your turtle unattended in the temporary home, especially if you have other pets or young children. Even in their temporary home, your turtle requires consistent supervision to ensure their safety and wellbeing.
Back to Life, Back to Reality
Once you have emptied and cleaned your turtle’s tank, it’s time to bring it back to life. Reassembling your turtle’s tank might seem a daunting task at first, especially if this is your first time. However, the process is simpler than you may think. Here, we’ll guide you step-by-step on how to go about it.
First things first: replace the substrate, or the bottom layer of your tank. This could be anything from gravel to sand or even commercial substrate. Depending on the type of turtle you have, the substrate can vary. It’s advisable to replace about two inches of the substrate with fresh material every time you clean the tank. This not only provides a clean base for your turtle but also prevents any harmful bacteria from growing.
Next, reintroduce the hideouts and basking spots into the tank. Turtles often use these areas for relaxation and warmth. Remember to place them securely so that your turtle can’t knock them over or get trapped under them. Also, it may be helpful to rearrange these elements occasionally to keep your turtle’s environment stimulating.
Now, it’s time for the water. Depending on the size of your turtle and the tank, the amount of water needed will vary. A good rule of thumb is to make sure the water is at least twice as deep as your turtle’s shell is long. However, be careful not to overfill as turtles also need a dry area within their environment. Additionally, ensure that the water temperature falls between 75°F and 85°F, which is the ideal range for most turtle species.
Then, reconnect the filters and heating elements. These are essential components of a turtle tank setup that help in maintaining the health and hygiene of your pet. Providing good filtration will help keep the water clean for a longer period and reduce the frequency of cleaning. Also, maintaining the right temperature guarantees the comfort and health of your turtle.
Lastly, before placing your turtle back inside, allow some time for the water to settle and reach the desired temperature. Remember to handle your turtle gently and wash your hands both before and after handling your turtle, as they can sometimes carry salmonella.
It is essential to regularly clean and maintain your turtle’s tank to provide it with a healthy and satisfying living environment. Taking the time to properly clean and reassemble your turtle tank will ensure that your pet turtle stays happy, healthy, and full of energy!
Commercial Cleaning Solutions & Their Alternatives
Turtle tanks, like any pet habitat, require regular cleaning to ensure the majority of the tank’s health and well-being. While there are commercial cleaning solutions on the market, many people are looking for more natural alternatives. This article will discuss both all-natural cleaning solutions and commercial options.
All-Natural Cleaning Solutions
While it’s important to ensure that any cleaning products you use are safe for your turtle, there are a number of all-natural solutions you can utilize. The simplest method is a 50/50 solution of water and white vinegar. Vinegar is a natural and safe disinfectant that can easily cut through the grime and dirt that build up in a turtle tank. An alternative to this is a lemon juice solution, using four tablespoons of natural lemon juice per half liter of water.
Another all-natural solution is baking soda. It is a mild abrasive and can help to clean surfaces without scratching them. A thick paste of baking soda and a small amount of water works really well for cleaning the tank walls. Remember, it’s important to rinse the tank thoroughly with warm water to remove any cleaning solution residue before reintroducing your turtle into its clean home.
Commercial Options Available
If you prefer commercial cleaning options, there are several pet-friendly products available on the market. One such product is “Zoo Med Wipe Out 1,” which is a terrarium and small animal cage disinfectant, cleaner, and deodorizer. It’s safe for a range of pets, including turtles, and can be used to safely clean your turtle tank.
Another commercial product is “Fluker’s Clean Reptile Cage Cleaner and Deodorizer” which can be used to keep your turtle tank clean and free from unwanted smells. This product is especially useful for people who have multiple pets as it can be used in a variety of habitats. Remember always to follow the instructions on these commercial cleaning products to ensure they are used properly and are fully safe for your turtles.
Regardless of whether you choose a natural cleaning solution or a commercial product, regular tank cleaning and maintenance is key to ensure that your pet turtle remains as happy and healthy as possible. Remember, what works for one turtle owner might not necessarily work for another, so don’t be afraid to experiment with the both types of cleaning methods until you find what works best for you and your tank.
Maintaining a Clean Tank in the Long Run
Keeping your turtle’s home clean not only makes it more aesthetically pleasing but also contributes to your pet’s overall health and wellbeing. A clean tank reduces the chances of your turtle contracting diseases and reproduces a more natural and enjoyable habitat for them. Here are some tips for preventive maintenance to keep your turtle tank clean longer.
1. Regular Water Change: The most effective preventive maintenance tip for a turtle tank is regularly changing the tank’s water. Replace at least 25-50% of the water weekly. This practice reduces buildups of waste products and maintains the water quality. Remember, the cleanliness and clarity of the water directly affect your turtle’s health.
2. Proper Filtration: A quality filter is crucial in ensuring that tank water remains clean and healthy for your turtle. The filter should be capable enough to handle the size of your tank and your turtle species. Aim for a filter capable of filtering at least 2-3 times the volume of your tank per hour. The two primary types of filters beneficial for turtle tanks are canister filters and internal filters.
3. Correct Feeding Practices: Overfeeding your turtle can be detrimental to its health and also to the cleanliness of your tank. Uneaten food decays in the water, promoting bacterial growth and leading to a dirty tank. Feed your turtle only the amount it can eat in about 5 minutes. Remove any uneaten food from the tank to avoid decay and pollution.
4. Regular Debris Removal: In addition to leftover food, other kinds of waste such as feces and shed skin contribute to a dirty tank. Using a small net to remove visible waste on a daily basis goes a long way in keeping the tank clean. This prevents decomposition of organic matter in the tank, which can foul the water and potentially harm your turtle.
5. Regular Cleaning of Tank Accessories: The various accessories in your turtle tank, such as rocks, caves, basking platforms, and plants, can also harbor dirt and waste. Cleaning these accessories regularly is crucial in maintaining a clean tank environment. Ideally, clean these items when carrying out the regular water change.
Remember, a healthy habitat is the cornerstone of your turtle’s wellbeing. By incorporating these preventive maintenance tips into your routine, you can provide a cleaner, healthier environment for your turtle to thrive.
Resources
- https://www.cdc.gov/healthypets/pets/reptiles/trouble-with-tiny-turtles.html
- http://publichealth.lacounty.gov/vet/docs/TurtleBeforeYouBuySalmonellaColor.pdf
- https://www.fws.gov/sites/default/files/documents/seaturtle-standard-conditions-for-care-2019.pdf