How Long Do You Soak Black Turtle Beans
Whether it’s a hearty soup or a well-seasoned side dish, black turtle beans are a popular component in many home-cooked meals. However, a common question arises: How long should you soak black turtle beans before cooking?
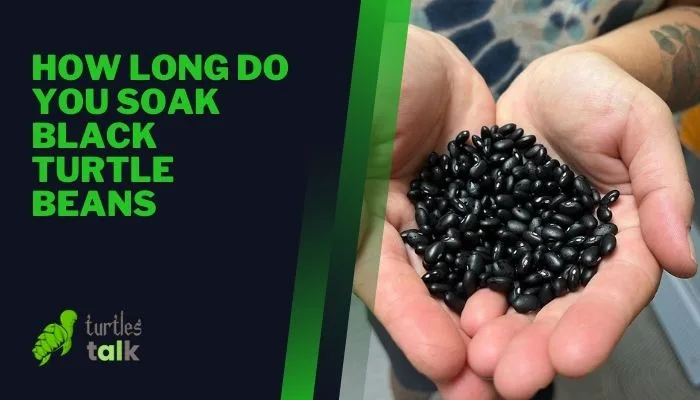
The answer is simple: black turtle beans should be soaked for at least 8 to 10 hours, or overnight. This process reduces their cooking time and makes them easier to digest.
Interested in learning more about the soaking process and why it’s so crucial? Keep reading! We’ll delve further into this kitchen query.
The Unconventional Charm of Black Turtle Beans
At first glance, black turtle beans might look relatively unassuming with their jet-black outer shell. However, these small yet vibrant legumes are full of nutritious elements and incredible flavors that reveal their real charm. Originating from Central and South America, they have been utilized for hundreds of years as a transformative ingredient in a wide variety of hearty and satisfying meals.
A closer look at: Black Turtle Beans
Known by many names, such as black beans, frijoles negros, or simply, black turtle beans, these shiny legumes are small, oval-shaped, and when cooked, offer a texture that is both creamy and meaty. A staple in many Latin American as well as Caribbean cuisines, the black turtle bean’s savoury flavour sees it used in a myriad of dishes ranging from soups and stews to salads and sauces. Furthermore, due to their high protein content and dense texture, they also make an excellent meat substitute in vegetarian and vegan diets.
Nutritional value of Soaking Black Turtle Beans
Here’s where the strength of the black turtle beans truly lies. These powerhouse legumes are loaded with fiber, protein, and various nutrients like folate, magnesium, and iron. A cup of cooked black beans provides about 15 grams of protein and almost zero fat. Additionally, they are a rich source of antioxidants, compounds that help fight off harmful free radicals in the body.
But why soak them? Soaking beans before cooking not only shortens cooking time but also makes them easier to digest and allows your body to absorb more of their nutrients. By soaking black turtle beans, it helps to break down their indigestible sugars, which are often the culprits of gassy discomfort. To soak, you simply have to cover the beans in water and leave them to sit for about 8-12 hours, although they could go for as long as 24 hours if needed. Once they’re nice and plump, you can drain and rinse them, and they’re ready to be used.
The historical and cultural significance of Black Turtle Beans
The black turtle bean has a rich history that is deeply intertwined with the cultures it originates from. They date back over 7,000 years when they were first cultivated in Peru and then spread throughout South and Central America. Hailed for their versatility and nutritional prowess, black turtle beans have been at the center of many traditional dishes, such as the Cuban black bean soup and Brazilian feijoada.
In addition, their cultural significance reaches beyond the culinary landscape. In many cultures, the black bean is viewed as a symbol of luck and prosperity and is often included in celebratory dishes and events. This deep-rooted significance ensures that the black turtle beans continue to be enjoyed and celebrated across the globe.
Why Soak Your Beans?
Understanding why and how to soak beans is essential to unleash all the fantastic nutritional benefits they have to offer. In this case, we’re specifically considering black turtle beans, but the principle applies to all legumes.
The reason behind soaking beans
The primary purpose of soaking your beans before cooking is to soften their skin, reducing cooking time significantly. If you’ve ever tried cooking unsoaked beans, you’ll know it takes a tedious amount of time for them to become soft. Soaking cuts down this time, letting you enjoy your beans much faster!
Beyond savings on time, soaking helps to remove some of the indigestible sugars present in beans. These sugars can lead to uncomfortable digestive issues, so it’s a critical step if you want to keep your tummy happy.
Health benefits of pre-soaking
Soaking beans not only speeds up cooking time but also makes them healthier to eat. Beans, including black turtle beans, contain a natural substance called phytic acid, which can block the absorption of essential minerals like iron, zinc and calcium in your body.
Studies have shown that soaking beans for at least 12 hours at room temperature can reduce the phytic acid content by up to 60%. This reduction aids in improving the nutritional value beans offer, as more of these critical minerals become available to the body.
The magic behind reducing the “gassy” effect
Beans are notorious for causing gas or bloating due to their high content of a type of sugar called oligosaccharides. This sugar is tough for our bodies to break down and can cause some unpleasant side effects as it gets fermented by bacteria in our gut.
Ever heard of the phrase, “Soak your beans and save you from a whole lot of pooting”? It’s based on truth! Soaking beans can help reduce their oligosaccharide content, making them more comfortable to digest.
By knowing how and why to soak your beans, you can maximize the nutritional content and more importantly, keep digestive discomfort at bay. So, don’t skip the soaking process for a happier, healthier, and more enjoyable meal!
The Art and Science of Soaking Black Turtle Beans
If there’s one thing any lover of Mexican and Caribbean cuisine appreciates, it’s the beauty and deliciousness of black turtle beans. The art and science of soaking these gems is what ensures their rich, savory flavors come to life in your dishes. Let’s explore this process in more detail.
Preparation before the soak
Before we even discuss soaking, it’s crucial to prepare your beans correctly. The first step is an often underestimated stage: choosing the right beans.
Choosing the right beans
Not all black turtle beans are created equal. Small, immature beans tend not to cook thoroughly, while large, overripe ones may end up mushy. Therefore, it’s best to purchase beans from a reputable supplier or a grocery store with a high turnover to ensure their freshness. You should look for beans that are whole and unbroken, with a glossy black shine indicating a firm and creamy texture once cooked.
Checking and rinsing your beans
After hustling for the best black turtle beans, the next step is to do a quick check. Spread them out on a flat surface and remove any stones, broken beans, or discolored ones. Then, rinse your beans under cold water to remove any dirt or dust.
To soak or not to soak: the opposite camps
The debate about whether or not to soak black turtle beans before cooking has been going on for ages. The consensus varies depending on who you ask. Some cooks swear by overnight soaking, saying it reduces cooking time and makes the beans easier to digest. They recommend soaking black turtle beans for a minimum of 8 hours or overnight. The ratio generally suggested is three cups of water for each cup of beans.
On the other hand, there are cooking experts who argue that soaking isn’t necessary. They believe it leeches flavor from the beans and that slow cooking them without a pre-soak yields a dish with a more robust taste. This typically involves simmering the beans on a stovetop for approximately 1.5 to 2 hours until they are tender.
Ultimately, whether to soak or not comes down to personal preference and available time. Both methods have their merits. Meanwhile, enjoy the culinary journey of preparation, and may your black turtle beans always be delicious!
Step-by-Step Guide: Soaking Black Turtle Beans
When preparing black turtle beans, soaking is an essential step that can help to soften these hardy legumes and reduce their cooking time. However, before you dive into the process, it’s important to understand that there are two primary techniques of soaking black turtle beans: the overnight soaking method and the quick-soak method.
The overnight soaking method
The overnight soaking process is a traditional method that requires a bit more time, but it’s incredibly straightforward and easy to do. This method is excellent for those who prefer to prepare their meal components in advance, as it allows you to set your beans to soak overnight, leaving you with perfectly softened black turtle beans by morning.
How to: The overnight soaking process
To soak your black turtle beans overnight, start by placing them in a large bowl. The number of beans will depend on your recipe, but generally, a cup of dried beans will yield about three cups of cooked ones. Next, add enough cold water to cover the beans by about 2-3 inches, since they will expand while soaking. Once your beans are submerged, leave them to soak at room temperature for about 8-12 hours. After soaking, you should drain the beans and rinse them thoroughly before cooking.
The quick-soak method
On the other hand, if you’re pressed for time or forgotten to soak your beans overnight, the quick-soak method can be a real lifesaver. This method involves boiling the beans for a short period and then letting them soak in the hot water for about an hour.
How to: Quick-soak in a nutshell
To quick-soak your black turtle beans, start by adding them to a large pot. Again, the amount will depend on your recipe. Add enough water to cover the beans by about 2-3 inches. Bring the water to a rolling boil and let the beans cook for about 2-3 minutes. After that, remove the pot from the heat, cover it, and let the beans soak in the hot water for about an hour. After soaking, just as with the overnight method, it’s important to drain and rinse the beans before using them in your recipe.
After Soaking: Tips and Tricks
So, you’ve soaked your black turtle beans and are now wondering what to do next? Fear not! We’ve got some great tips and tricks lined up for you.
What to do after soaking your beans
First, you need to drain the beans using a colander to get rid of the soaking water. This water contains oligosaccharides, the stuff that can cause gassiness, and by draining it, you can eliminate these elements from your beans. After draining, rinse your beans under cold running water to wash off any other residue.
Next, place your beans into a pot, add fresh water, and start cooking. How much water, you ask? A good rule of thumb is to add water that is about two to three times the volume of the beans.
Cooking and seasoning your soaked beans
Bring your beans to a boil over high heat. Once boiling, reduce the heat, cover your pot and let it simmer. It will typically take about 60-90 minutes for the beans to get tender. You can test for doneness by squishing a bean. If it smashes easily, they are done!
As for seasoning, beans love flavorful companions. Try adding a bay leaf, a piece of onion, garlic cloves, or a sprinkle of cumin while they simmer. Adding salt? Hold off until the beans are cooked. Adding salt too early can make your beans tough.
Storing your soaked beans
If you’ve got leftover soaked beans that you won’t use right away, don’t worry. You can refrigerate these beans for about 2-3 days. Or, for longer storage, you can freeze them. Just make sure to drain and rinse them before storing!
Freezing beans is easy. Once they have cooled down, simply spread them on a baking sheet lined with parchment paper. Put the sheet in the freezer for a couple of hours. After the beans are frozen, transfer them into a freezer-safe bag or container. Beans can last in the freezer for 2-3 months.
Common Mistakes When Soaking Black Turtle Beans and How to Avoid Them
One of the most common mistakes when soaking Black Turtle Beans is not soaking them for long enough. Black Turtle Beans should be soaked for a minimum of 8 hours, but for the best results, a full 12 hours of soaking is ideal. This long soaking period helps break down some of the complex sugars that can cause digestive discomfort and also reduces the cooking time. Not soaking the beans for the recommended time can lead to beans that are too hard, won’t cook properly, or may cause digestive issues.
Another common mistake is not using enough water. Black Turtle Beans increase in size significantly during the soaking process. The general rule of thumb is to add three cups of water for each cup of dried beans. Underestimating the amount of water needed can leave you with partially soaked beans, which can result in uneven cooking. If you’re not sure about the right amount, it’s always better to err on the side of too much water rather than too little.
Some people tend to add salt or acidic ingredients like vinegar or tomatoes during the soaking process. This is actually a big no-no when it comes to soaking Black Turtle Beans. Adding salt or acidic ingredients too early can toughen the beans, significantly increasing the cooking time. It’s best to add these ingredients only after the beans have been fully cooked.
Lastly, a few individuals forget to discard the soaking water. This water absorbs some of the complex sugars that are harder to digest. By throwing it out and using fresh water for cooking, you reduce the chances of experiencing gas or other digestive discomforts after enjoying your meal.
Soaking Black Turtle beans might seem like a straightforward process, but as we’ve seen, several mistakes can compromise the end-results. By following these guidelines, you’ll achieve perfectly soaked beans every time.
Additional Tips for the Perfectly Soaked Black Turtle Beans
Soaking black turtle beans for at least 8 to 12 hours is generally recommended. However, with some additional tips and tricks, you can enhance the flavor and texture of your beans making them even more delicious. Here are a few additional tips for the perfectly-soaked black turtle beans.
Firstly, it’s essential to inspect the beans before soaking. Lay them out on a flat surface, remove any small stones, broken beans or other debris. Then give them a quick rinse under cool water. Post that, they are ready to be soaked.
When it comes to soaking, you should always ensure there’s a generous amount of water. For every cup of beans, you should use about three to four cups of water. This is due to beans absorbing significant quantities of water as they expand, and you want to avoid them becoming exposed because there isn’t enough water.
An optional tip is to add a piece of kombu, a type of kelp (seaweed), during the soaking process. Kombu helps soften the beans and make them more digestible. If you can’t get kombu, a pinch of baking soda can serve a similar function and also speed up the cooking time considerably.
Over-soaking the beans is another issue you want to avoid. If left to soak for more than 24 hours, black turtle beans can begin to ferment. This has an impact on their taste and also can lead to digestive discomfort. It is therefore recommended to change the water every few hours if soaking for an extended period.
Finally, once the beans are fully soaked and ready to cook, rinse them a final time under cool water. The soaking water contains oligosaccharides, a type of carbohydrate which can lead to digestive discomfort. Rinsing the beans after soaking reduces this potential problem.
By following these additional tips, you’ll have perfectly soaked black turtle beans, ready to be turned into a variety of delicious meals.
Resources
- http://arsftfbean.uprm.edu/bic/wp-content/uploads/2018/04/Bean_Processing.pdf
- https://www.canr.msu.edu/news/black_beans_and_the_science_behind_them
- https://extension.umaine.edu/food-health/2020/10/01/eat-well-fall-winter-2020/